

How to Straighten Hair Without Heat
Making waves or curls straighten out is possible without hot tools or chemical treatments, two of the most potentially damaging things you can use on your hair.
Though these heat-free methods will not leave hair as stick-straight and sleek as a flatiron would, they allow you to straighten your hair without the risk of damage. They’ll work best for those with loose curls, waves, or a hair type on the finer side.
If you have coarse or curly hair, we don’t want to promise too much, but these techniques – brushing, wrapping, rolling, cool-drying, and banding – can all be used to “stretch” out the curl a bit to change up your hair texture. Another factor to consider is the season, as humidity will play a part in how long your straight hair will stay that way. Applying some hair styling products can help. Keeping naturally curly hair straight can be a challenge, but just remember that curl-less people are envious and wonder how to make straight hair wavy!
How to Straighten Hair Without Damaging It
When using any of these techniques, prep properly. When you’ve finished washing and/or conditioning your hair with a detergent-free shampoo, squeeze out as much extra water as possible. Press with a towel (a microfiber towel such as Aquis works best to absorb water without roughing hair up). Then, when your hair is damp but not soaking wet, work some leave-in conditioner through it evenly to prep your hair and help hold the straightened shape once you’re done. Here are our top tips on how to straighten your hair without heat.
Method 1: Brushing
This is the simplest method to straighten natural hair, but it does require that you have the time to wait for your hair to fully dry. Find your part with a comb or your fingers, and use your hands to brush your damp hair down and pull it tightly. Keep doing this every few minutes until your hair is completely dry, adding more leave-in conditioner if necessary. Though you may not end up with much lift at the root, you will get a nice, natural hair texture that doesn’t look too done. If you need to tame any strays, stick to an oil-based product to smooth hair out.
Method 2: Wrapping
While your hair is wet, comb and divide it down the middle. Comb the left section all the way over to the right (yes, it’s a kind of combover) and wrap it around the back of your head. Use large bobby pins to secure it. Guide the right portion over the left side of your head, and wrap and pin it as well. Let your hair air dry completely, which could take time. To sleep on it overnight, wrap it all up in a silk scarf.
You can also blow dry it all with cool air until nearly before you wrap. To prevent the bobby pins from leaving dents, sandwich a sliver of cardboard or tissue between pins and hair.
Method 3: Rolling
It may seem old-fashioned, but this technique is not only tried and true, it’s the best choice for straightening coarser, curlier textures. Use about six jumbo rollers – plastic rollers yield a smoother effect than those made of Velcro or foam.
Section damp hair the width of the rollers, comb it up, and wrap it flat against the roller. Keep the tension even as you roll, and use a duckbill clip on each side of the roller to secure it.
You can experiment with the size of the rollers: the bigger the roller, the straighter the hair.
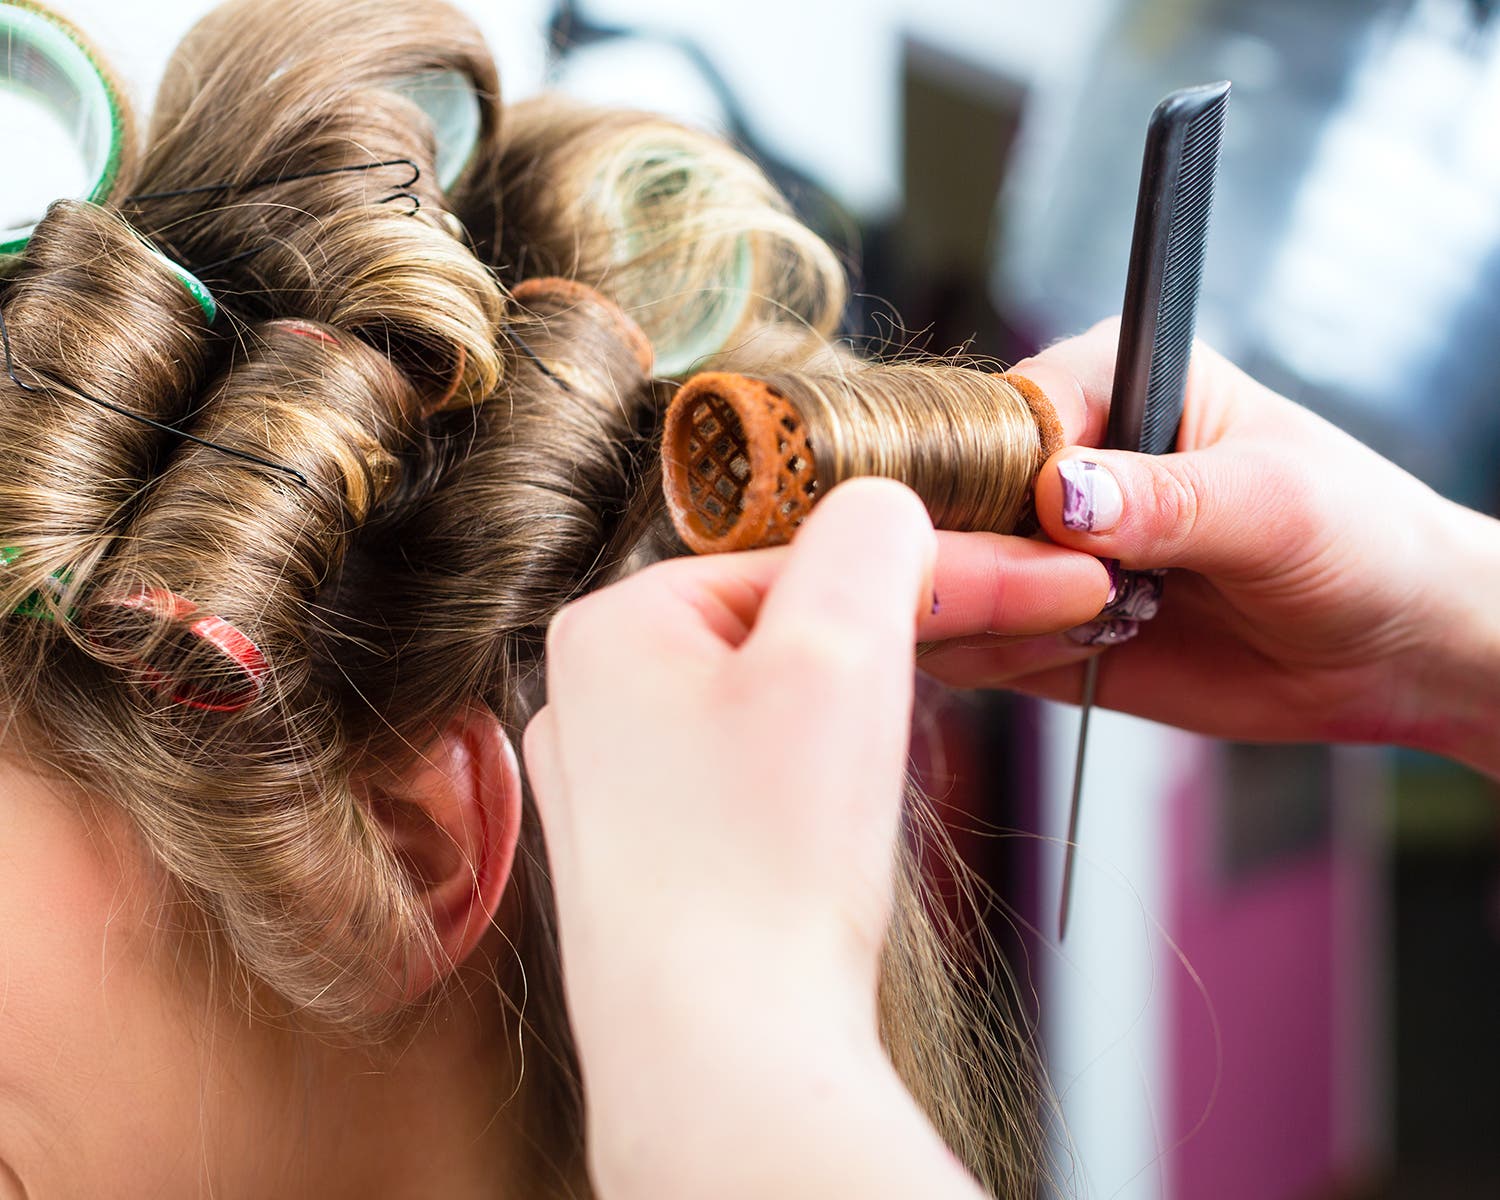
If you want a bump at the crown, place the largest rollers there, and get a nice curve at the ends with smaller ones. In any case, don’t remove the rollers until you have completely dry hair, because even a little moisture can re-activate your curl or wave.
Those with particularly resistant hair types can take it an extra step by dry-wrapping straightened hair after removing the plastic rollers (see above). Tie a scarf around it all to smooth hair even more.
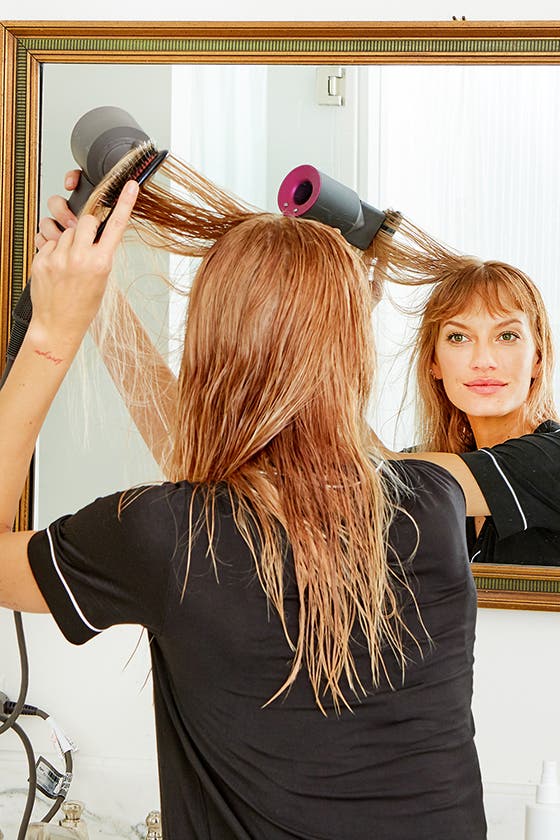
Method 4: Cool Blow-Drying
We know you’re looking to avoid heat, but using electricity isn’t exactly cheating. Use a blow dryer set on cool along with a brush and your fingers to coax curly hair straight. The trick here is to keep the nozzle pointed steadily out and down toward the ends of your hair and move it in concert with your hand or brush.
Since dirt and oils collect in your brush and can transfer back into your hair, it’s important to keep in mind how to clean a hairbrush. Once you have completely dry hair, use a touch of oil or pomade to calm flyaways or frizz.
Method 5: Banding
Unlike rollers or wraps, this method can also be worn as a style in and of itself. Pull damp hair into a low ponytail – two or more if it’s very thick. Fasten it with a soft hair tie or small scrunchie, then add additional ties spaced an inch or so apart down the length of the ponytail to hold it together.
Don’t bind them so tightly that they leave marks on your hair; just do so enough to hold the ponytail together. Let dry completely – this is also a great overnight option – then remove the bands. If you’re in a pinch and looking for another easy hairstyle, learn how to do a messy bun with thin hair.
* * *
With a few tools and some patience, air-drying is the healthiest option to treat hair, especially if it’s damaged or fragile. If you’re familiar with how hair extensions work, you’ll know that these heat-free methods are good choices to avoid damaging extensions with heat styling. That’s not to suggest you can retire the blow dryer and flat iron forever, but best consider them an option rather than an obligation. When you do reach for the hot tools, make sure you know how to heat-style safely.

